
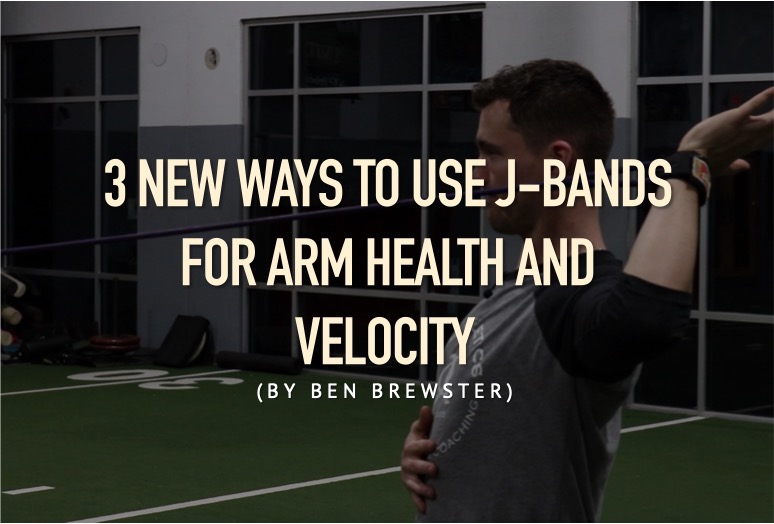

by Ben Brewster
Jaeger bands have become a staple in baseball warm-ups around the country over the last 10 years – from youth travel teams to Division I college programs, their ease of use and versatility have made them massively popular.
Still, 99% of how they are used is in the exact manner they are marketed – dynamic repetitions of a variety of upper body movements (like rows, presses, diagonal raises and external rotations), in order to prep the arm for throwing. The logic is sound – and just as dynamic warm-ups for the lower extremity are a no-brainer prior to sprinting, it makes similar sense to pump blood into the muscles, stimulate those motor units, begin to activate the nervous system, and help lubricate the synovial joints by taking them through full ranges of motion.
From a warm-up standpoint, few would argue that light resistance bands aren’t a convenient way to achieve these goals, even with other options available that similarly fit the bill (light dumbbells, shoulder tube, wrist weights, etc).
Over the past 10+ years of incorporating J-bands into my own warm-ups, I’ve recently begun to incorporate several new approaches to J-bands, beyond the light, rapid-fire dynamic warm-up methodology.
Without further ado, here are three novel ways to incorporate J-bands into your training and arm care routine.
1. Overloaded Eccentrics (post-throwing)
J-bands (and bands in general) are just a form of resistance. As such, it intrigues me that people place a huge distinction between the “warm-up” benefits of J-bands and the “scapular strengthening” benefits of Crossover Symmetry band. Indeed, the main difference lies in the application of this resistance, as either of these bands could be used for warm up or strengthening purposes.
Warm-Up: Light resistance, not taken to the point of muscular fatigue/failure, achieve full ROM
Strengthening: Moderate / heavy resistance, fatigue inducing, achieve full ROM
However, let’s take what we know about strengthening muscles a step further. A given muscle is approximately 25-50% stronger on the eccentric (negative) phase of the movement than on the positive (concentric) phase. Nevertheless, most shoulder strengthening movements are done using the same load on both the concentric and eccentric phases, effectively missing out on muscle fiber recruitment during the negative phase of the lift.
Not only has it been consistently shown that eccentric strength training leads to improved strength and hypertrophy across a wide range of movements (and muscles), but the very muscles that J-bands tend to focus on are decelerators in the throwing motion meaning they will be asked to fire eccentrically during the throwing motion. Because muscles like the posterior cuff and low trapezius must work hard during deceleration to slow down shoulder internal rotation and scapular anterior tilt, it makes eccentric training especially relevant for throwers.
Furthermore, eccentric training has been shown to reduce the risk of muscle strains, at least as it relates to sprinting and hamstring strains. How? The answer, as laid out in this research review, lies in improving the ratio of eccentric to concentric strength. In other words, just doing normal reps grants a disproportionate gain in concentric strength throughout your body without proportionally strengthening the eccentric portion of the movement. It makes logical sense, then, that if your accelerators out-develop your brakes as an athlete, you are at a higher risk of injury, and vice versa. What eccentric training does, over time, is to increase the ratio of your brakes relative to your accelerators, ensuring that you’re going to be producing forces that your body is sufficiently equipped to decelerate.
While there are many techniques to overload the eccentric phase of a movement, we’re going to focus on two ways of doing this with bands:
- Assisted Concentric paired with a slow eccentric
- Eccentric only
Assisted concentric
For the first way of overloading the eccentric, you’ll be backing up to a resistance that you can’t quite finish the positive phase of the rep on your own, and you’ll use your off arm to take some tension out of the band at the end range of the movement – just enough to allow you to hit the limits of your available range of motion. Now: still activating the target muscles properly, remove the assisting arm and let that extra band tension pull your back to the starting position, resisting the entire way. By using more resistance than you would otherwise be able to use, you’ll be overloading the eccentric, and by assisting yourself on the concentric you’ll still reach full range on the concentric, creating a near-perfect strength curve (for perfect strength curves, meaning that there is maximal muscle fiber recruitment throughout the entire range of motion of the exercise, requires manual resistance, which is less practical and I’ll have to touch on in another article).
Eccentric only
For the eccentric-only method, you’ll take the band without any resistance and position your arm and shoulder at the end range of the movement. From here, brace in an isometric contraction and step back until the band begins to force the eccentric to begin. By focusing on a perfect, unloaded starting position, you can reinforce strength in your weakest and most vulnerable nooks and crannies.
Take a look here at these movements in action:
Suggested use: post-throwing, 2-3x per week
Rather than incorporating overloaded eccentrics pre-throwing, when you least want to fatigue out the rotator cuff and dynamic stabilizers of the shoulder, sprinkle in a couple sets throughout the week post-throwing.
Sample Week
Day 1 – Assisted concentric
-Band Ys & T’s: 2-3 x 10 reps
-Band External Rotations: 2-3 x 10 reps
-Reverse throwing pattern: 2-3 x 10 reps
Day 3 – Eccentric only
-Band Ys & T’s: 2-3 x 10 reps
-Band Face Pull with External Rotation: 2-3 x 10 reps
-Reverse throwing pattern: 2-3 x 10 reps
Day 5 – Assisted concentricBand Ys & T’s: 2-3 x 10 reps
-Band External Rotations: 2-3 x 10 reps
-Reverse throwing pattern: 2-3 x 10 reps
Caution: if you’re already doing targeted eccentric shoulder and scap training in the weight room, adding in more eccentrics may be overkill. Take this recommendation within the context of an athlete’s overall program and how he is recovering.
2. Low Impact Mechanical Patterning (pre-throwing)
One of the biggest challenges for baseball coaches is the complexity of motor learning and skill acquisition. How do you fundamentally change how an athlete moves? Is there a tissue or joint block preventing proper mechanics? Should you use internally or externally focused cues? How do you re-write tens of thousands of improperly done repetitions without making the athlete hyper-aware of their movements and become robotic through their new patterns?
As such, I’m always keeping a lookout for new or existing tools to address some of the more common and stubborn movement flaws we see in our athletes. Medicine balls, Indian clubs and even dumbbells have fallen victim to some of these low load patterning ideas – and J-bands are no exception.
There are two main ways so far that I’ve begun to incorporate bands for patterning purposes (and I’m sure there will be more in the future). These are:
- To teach the relationship between hip rotation and front leg extension.
- To teach the “feel” of delaying the arm behind shoulder rotation and “pulling” into release with the pecs/lats vs. “pushing” with the tricep.
Hip rotation and front leg bracing
For this drill, the purpose is to re-program from square one how front leg bracing occurs. Rather than slamming into landing on the front foot and extending via the quad forcibly contracting to “push” the leg into extension, this drill teaches how to feel the front leg being “pulled” into extension as hip rotation is completed. By encouraging athletes to feel full hip rotation occur, front leg bracing is an inevitable byproduct.
I separate this drill, which I call an ipsilateral (same side) row, into four progressions:
- Hips + shoulders closed, rotating together
- Hips + shoulders closed, hips go first
- Hips open + shoulders closed
- Hips open + shoulders closed with step-into
Check out these progressions in the video below:
Suggested use: 5 minutes daily as part of your J-band warm-up series
This progression for the front leg feeds very well into this next medicine ball drill, a dynamic version of the same pattern. We’ll dive deeper into this in a different article but I’ll leave this video here for you to chew on.
“Pulling” into release*
I’ll prescribe this drill, which I call band throws, to an athlete’s J-band warm-up if I determine they are pushing the elbow forward into release and aren’t responding to a number of throwing related cues that we’ve used to try to fix the issue. This drill forces the arm to “lag” behind the shoulders, initiating a stretch of the pectorals and preventing any pattern besides “pulling” the humerus forward from behind the midline of the body into horizontal adduction and internal rotation. As such, this is part of the groundwork for reprogramming a tricep-driven “pushing” arm action.

It’s worth noting that sometimes pushing occurs because the front side opens so early that there is no way for the arm to take this efficient path into release – as such, improving the ability to segment the lower half and keep the front shoulder closed at front foot strike can also improve symptoms of pushing.
*I believe this is very similar (albeit with a different intent) to a drill from Ron Wolforth’s Combat Pitcher DVD. Credit to Ron if you’re the one who came up with the original version of this drill.
Full Video Explanation:
Suggested use: 2 sets of 10 reps daily as part of your regular J-band warm-up
This drill also pairs really well with medball wall dribbles (video below). Try to take the tricep out of it and “pull” into release via internal rotation.
3. Low-Load Isometrics (pre-throwing)
The purpose of low-load isometrics (gently pressing statically against resistance), as prescribed in many rehabilitation programs, is to reinforce the neurological communication or “activation” of the muscles that control a given joint position, without significantly loading the movement. These are typically done at extreme joint angles, which are often neglected in training programs. Reinforcing control of “delicate” or “end-range” positions (such as max external rotation or maximum horizontal abduction) where clean arthokinematics and muscle recruitment are extremely important, can be a useful addition for non-injured athletes as well.

Taking the joint into its nooks and crannies and holding those positions (versus just bouncing through them quickly), forces an improved proprioceptive connection between the brain and that specific joint angle.
This can be considered the pre-cursor to actually loading these end range positions more intensely, as seen in the PAILs/RAILs methodology and Functional Range Conditioning (FRC). Still, making sure to reinforce that neurological connection at several important joint angles makes logical sense to me, and so I’ve incorporated several of these rehabilitation movements into my regular J-band routine as a form of pre-hab.
The 3 joint angles I chose to reinforce in my warm-up are as follows:
- Max active external rotation @90: 6 x 6 sec holds each way at 20%
- Max active horizontal abduction @90 (T’s): 6 x 6 sec holds each way at 20%
- Max active horizontal abduction @130, (Y’s): 6 x 6 sec holds each way at 20%
Check it out in this video below:
Because these are non-fatiguing contractions, there’s no apparent downside to adding them in to your warm-up, and, anecdotally, they do seem to make you much more comfortable in these extreme or “delicate” positions that you are asking your arm to ballistically fire through on a regular basis. Gaining proprioceptive control over these positions, even if you don’t take it to the maximum effort extent of FRC, is a sensible step to take.
Closing thoughts
Standard J-Band routines do work if the goal is to do a general dynamic warm-up for the upper extremity – but these three applications both fill in the gaps from a warm-up standpoint and provide additional inspiration for applying this tool from a patterning and strengthening standpoint as well. Play with these exercises and let me know what you think by commenting below or emailing contact@treadathletics.com
Here’s to reaching your potential.
Ben
Athletes or coaches interested in remote one-on-one or team programming? Reach out via this application form.


?dl=0&preview=dominguez.gif&subfolder_nav_tracking=1)